You can capture incoming and outgoing traffic on your VPC using Flow Logs. Here is an example traffic log captured and saved in Cloudwatch:

Explanation for the first line:
- Timestamp: 2025-01-01T03:32:32.000Z
- Version: 2
- Account ID: 19x
- EC2 interface: eni-0384a7340ef45e46c
- Source Addr: 54.251.47.36
- Destination Addr: 10.0.160.78 (This is EC2 Private IP)
- Source Port: 123
- Destination Port: 58999
- Protocol: 17
- Packets: 1
- Bytes: 76
- Start time:
- End Time:
- Action: ACCEPT
- Log status: OK
1. Prerequisites
- Log Groups on Cloudwatch
- IAM Policy & Roles
- VPC
2. Create Log Groups on Cloudwatch
The traffic logs will be stored in cloudwatch. Follow these steps to create log group:
- Open cloudwatch page
- On left menu, click Logs > Log groups

- Click Create Log Group on the right menu
- Fill the following form:
- Log group name: ipsec-vpn-log (you can change it)
- Retention setting: 1 day (only 1 day log saved, after 1 day the logs will be deleted automatically)
- Log class: Standard
- Click Create

- Once created, you can see in the log groups list:

- Later, we will attach this Log groups to VPC.
3. Create IAM Policy & Role
VPC need a permission to write traffic logs into cloudwatch. So we have to create policy and role, then attaching role to VPC.
3.1 Create IAM Policy
- Open IAM dashboard
- On left menu, find Access Management > click Policies > Create Policy
- Switch to JSON tab, and enter the following JSON:
{
    "Version": "2012-10-17",
    "Statement": [
        {
            "Effect": "Allow",
            "Action": [
                "logs:CreateLogGroup",
                "logs:CreateLogStream",
                "logs:PutLogEvents",
                "logs:DescribeLogGroups",
                "logs:DescribeLogStreams"
            ],
            "Resource": "*"
        }
    ]
}
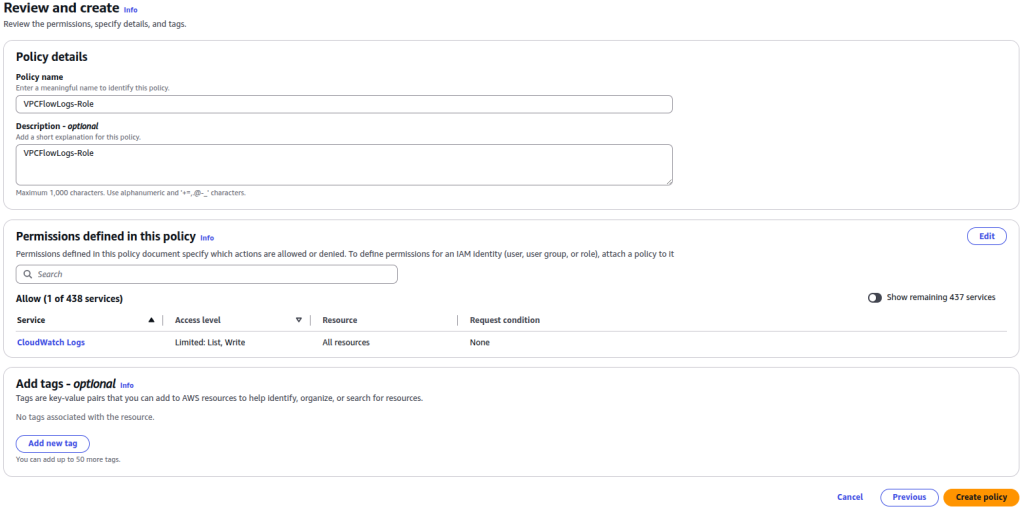
- Click Next, i am gonna name it VPCFlowLogs-Role for policy name and description. Then click Create Policy

3.2 Create IAM Role
- Still in IAM dashboard > Access Management > click Roles > click Create role
- Fill below form:
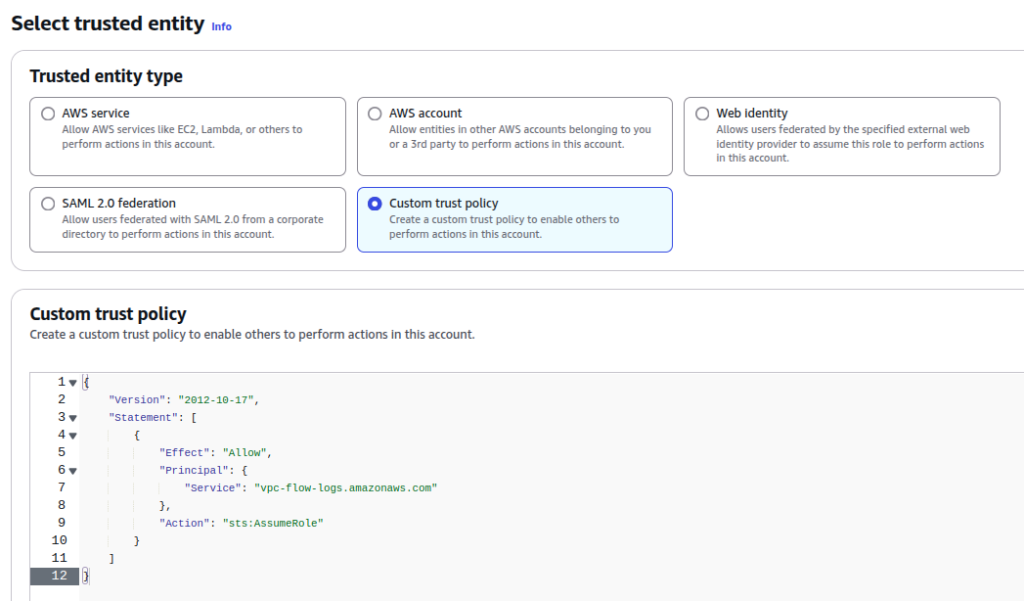
- Trusted entity type: Custom trust policy
- Custom trust policy:
{
    "Version": "2012-10-17",
    "Statement": [
        {
            "Effect": "Allow",
            "Principal": {
                "Service": "vpc-flow-logs.amazonaws.com"
            },
            "Action": "sts:AssumeRole"
        }
    ]
}
- Click Next
- On the next page, attach a policy that we previously created (VPCFlowLogs-Role) to the role. Click Next

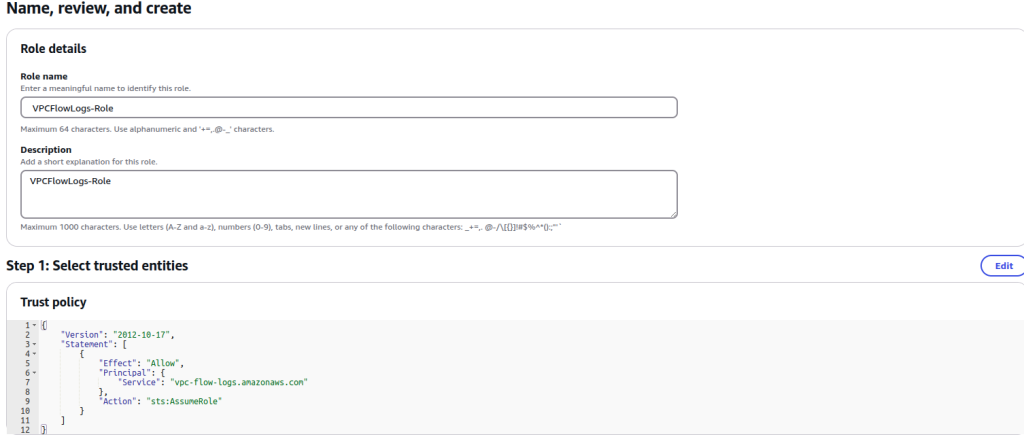
- Give it a name for role name and description with VPCFlowLogs-Role. Click Create Role

- After this, we will attach this role to VPC
4. VPC
By this time, we have created IAM Role (include policy) and Cloudwatch Log group. Now, let’s attach them to VPC.
- Go to your VPC dashboard, choose your VPC.
- On Flow Logs tab, click Create flow log

- Fill the following form:
- Name: flog-log-ipsec-vpn (you can change it)
- Filter: All
- Maximum aggregation interval: 1 minute
- Destination: Send to CloudWatch Logs
- Destination log group: ipsec-vpn-log (that we previously created)
- IAM Role

- Click Create flow log
- Once created, you will see flog-log-ipsec-vpn has registered in VPC.

5. See logs on Cloudwatch
Now, if there are any traffics come in and out from EC2 instance, Cloudwatch will create Log stream based on EC2 ENI-ID (Elastic Network Interface ID), the log will then be stored there. For example below, the ENI name created is eni-0384xxxx-all.
- Go to Cloudwatch dashboard > Logs > Log groups

- Click eni-0384xx-all for details. You will see any traffics recorded.

6. Pricing
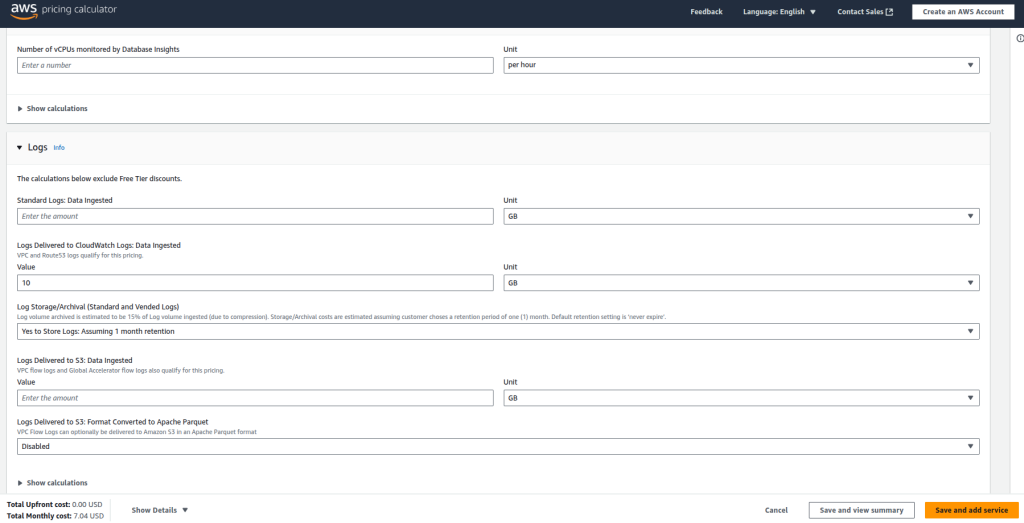
You will only be billed from cloudwatch log groups usage. For this tutorial, i use Singapore region. So the price if i stored 10GiB data is 7USD/month. You can make a calculation on AWS calculator.
