Sometimes, we need to change SSH key (private key) periodically, because of some reasons:
- for ISO 27001 requirements (key rotation)
- to prevent server from unauthorized user, example: One of our IT team, software engineer has resigned
To change SSH key, we have to replace authorized_keys file that exists in /home/ubuntu/.ssh with new RSA key. Here we will generate RSA key (2 files are id_rsa and id_rsa.pub).
- id_rsa: This is private key. Copy this file to your local computer, then login to EC2 instance with this key
- id_rsa.pub: This is public key. We will store this key in EC2 instance at /home/ubuntu/.ssh/authorized_keys
Prerequisites
- EC2 instance with OS: Ubuntu 24.04
Create backup for existing SSH key
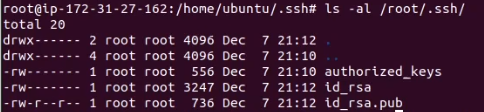
The existing SSH key is located at /home/ubuntu/.ssh/authorized_keys
Before replacing authorized_keys, we need to do a backup first.
- Login to server using SSH
- Navigate to /home/ubuntu/.ssh, and move autohorized_keys to autohorized_keys.old
cd /home/ubuntu/.ssh
mv authorized_keys authorized_keys.old- *Or copy authorized_keys manually to your local computer
Generate RSA Key
The second step is to generate RSA key:
- Run as root (sudo su)
- Generate RSA Key with the following command:
ssh-keygen -m PEM -t rsa -b 4096 -C "my-new-key"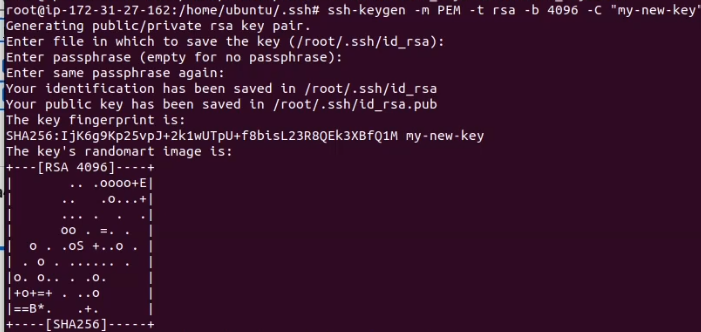
- There will be generating 2 files, id_rsa and id_rsa.pub
- Move id_rsa.pub to /home/ubuntu/.ssh/authorized_keys
mv /root/.ssh/id_rsa.pub /home/ubuntu/.ssh/authorized_keys- Then, change owner (chown) and permission (chmod). Run this command:
cd /home/ubuntu/.ssh
chown ubuntu:ubuntu authorized_keys
chmod 600 authorized_keys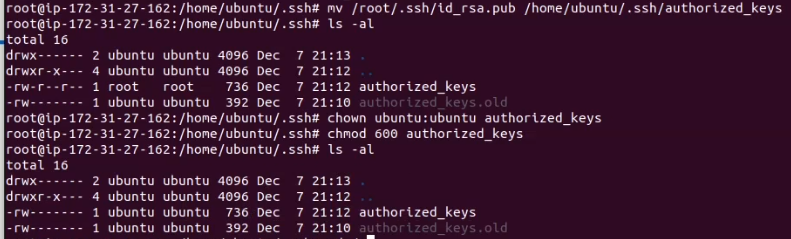
Copy id_rsa (private key) to local computer
id_rsa is private key (pem). Copy id_rsa to your local computer and name to my-new-key.pem
- Still in your EC2 instance
- Copy id_rsa content, started from —–BEGIN to END RSA PRIVATE KEY—–
cd /root/.ssh
cat id_rsa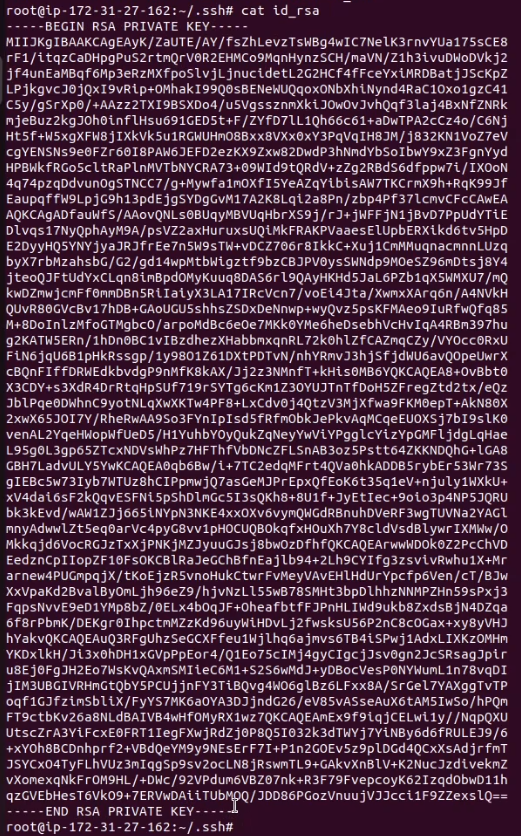
- Copy to your local computer. Here is my-new-key.pem looks like:

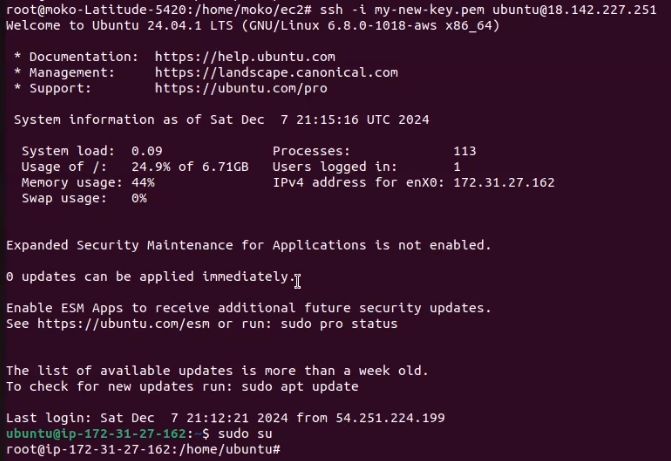
Test login with new key
Now, let’s connect with new key. Run command below to connect to EC2 instance.
ssh -i my-new-key.pem ubuntu@your-ec2-instance-ipIt should be successfully logged in.
Test login with old key
If you want to test with old key, it should be resulting: Permission denied (publickey)
ssh -i new-server.pem ubuntu@your-ec2-instance-ip
Conclusion
- To change SSH key is just running this command to generate new RSA key:
ssh-keygen -m PEM -t rsa -b 4096 -C "my-new-key"- Then, replace existing key (authorized_keys) with generated RSA key
mv /root/.ssh/id_rsa.pub /home/ubuntu/.ssh/authorized_keys
cd /home/ubuntu/.ssh
chown ubuntu:ubuntu authorized_keys
chmod 600 authorized_keys- Copy id_rsa (A.K.A private key) to your local computer, name it to my-new-key.pem
- Last, test connecting to EC2 instance with new key and you get notified: Permission denied (publickey)