In this tutorial, we are gonna install elasticsearch-php client and connect to Opensearch Service (Elasticsearch 7.10) on AWS Cloud.
Prerequisites
- You have already installed Elasticsearch 7.10 on Opensearch service with public access (internet), so we just go installing elasticsearch-php-client
- Using PHP 8.3.12 for elasticsearch-php client v7.11.0
- Installed Apache webserver
- Ubuntu 24.04
Summary steps
- Install composer on your local computer
- Install elasticsearch-php client v7.11.0
- Test connect to Elasticsearch 7.10
- Test create index
- Insert data
Let’s get started!
Install composer on your local computer
My workspace is under /var/www/html/elasticsearch-php
To install elasticsearch-php client, we need composer. Install it with the following command:
php -r "copy('https://getcomposer.org/installer', 'composer-setup.php');"

php -r "if (hash_file('sha384', 'composer-setup.php') === 'dac665fdc30fdd8ec78b38b9800061b4150413ff2e3b6f88543c636f7cd84f6db9189d43a81e5503cda447da73c7e5b6') { echo 'Installer verified'; } else { echo 'Installer corrupt'; unlink('composer-setup.php'); } echo PHP_EOL;"

php composer-setup.php

php -r "unlink('composer-setup.php');"
After running above command, it creates a file named composer.phar. In the next step we will use composer.phar to install elasticsearch-php client.
Install elasticsearch-php client v7.11.0
We will use elasticsearch-php client v7.11.0 (not latest version), because our elasticsearch is v7.10.0. I am worried if using latest version of elasticsearch-php client, it will not work (backward compatibility) for elasticsearch v7.10.0.
In order to install elasticsearch-php client v7.11.0, the command is as follows:
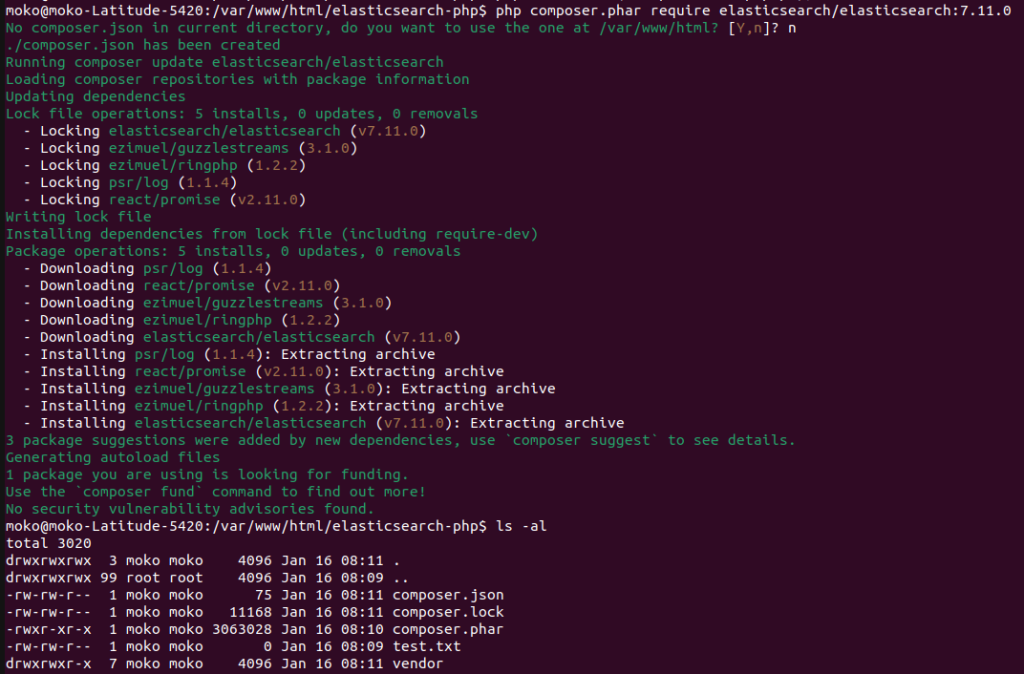
php composer.phar require elasticsearch/elasticsearch:7.11.0
If you run ls -al, you will see vendor folder. The elasticsearch-php client is installed inside that folder.
Test connect to Elasticsearch 7.10
For your information, this is my elasticsearch 7.10 setup installed on Opensearch service:

Now, let’s focus on testing connecting to elasticsearch 7.10. Create a file named index.php in elasticsearch-php folder. Then paste this script:
<?php
	require 'vendor/autoload.php';

	use Elasticsearch\ClientBuilder;

	$client = ClientBuilder::create()
	    ->setHosts(['https://search-xxxx-elasticsearch-g44-xxxx.ap-southeast-1.es.amazonaws.com:443'])
	    ->setBasicAuthentication('your elasticsearch username', 'your elasticsearch username')
	    ->build();

    $response = $client->info();

    echo "<pre>";
    var_dump($response);
?>
Explanation:
- Change setHosts value with your elasticsearch domain endpoint IPv4 (See above image)
- Change setBasicAuthentication values with your elasticsearch username, and password (this username, password you got from initial elasticsearch / opensearch service installation)
Run:
http://localhost/elasticsearch-php/If the connection is success, then the output is like this:

Test create index
By this time, we have successfully connected to elasticsearch v7.10.0.
Now we are going to test creating an simple index.
Modify your index.php and paste this script:
<?php
	require 'vendor/autoload.php';

	use Elasticsearch\ClientBuilder;

	$client = ClientBuilder::create()
	    ->setHosts(['https://search-xxxx-elasticsearch-g44-xxxx.ap-southeast-1.es.amazonaws.com:443'])
	    ->setBasicAuthentication('your elasticsearch username', 'your elasticsearch username')
	    ->build();

	$params = [
		"index" => "test-elasticsearch-php"
	];

	$response = $client->indices()->create($params);

	echo "<pre>";
	print_r($response);
?>
Run again:
http://localhost/elasticsearch-php/If succeed, the response is like this:

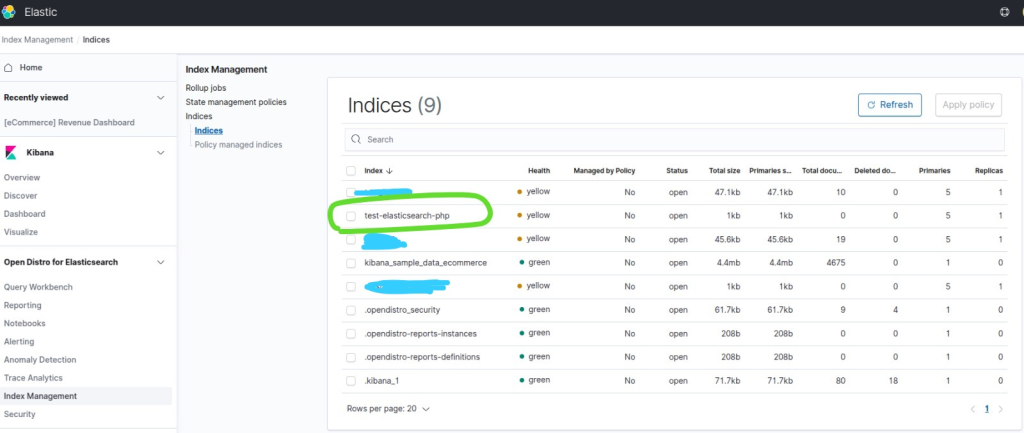
Check on kibana dashboard (provided by Opensearch service), go to Open Distro for Elasticsearch > Index Management, you will see test-elasticsearch-php is on there.

Great!, we have successfully created an index. Now let’s insert data in the next step.
Insert data
Modify your index.php, and paste in it:
<?php
	require 'vendor/autoload.php';

	use Elasticsearch\ClientBuilder;

	$client = ClientBuilder::create()
	    ->setHosts(['https://search-xxxx-elasticsearch-g44-xxxx.ap-southeast-1.es.amazonaws.com:443'])
	    ->setBasicAuthentication('your elasticsearch username', 'your elasticsearch username')
	    ->build();

	$params = [
		"index" 	=> "test-elasticsearch-php",
		"id"		=> "123",
		"body"		=> [
						"name" => "Moko",
						"address" => "Jl. Greenstreet",
						"create_date" => "2024-01-01 12:11:01"
					]
	];

	$response = $client->index($params);

	echo "<pre>";
	print_r($response);
?>
Run:
http://localhost/elasticsearch-php/It outputs:

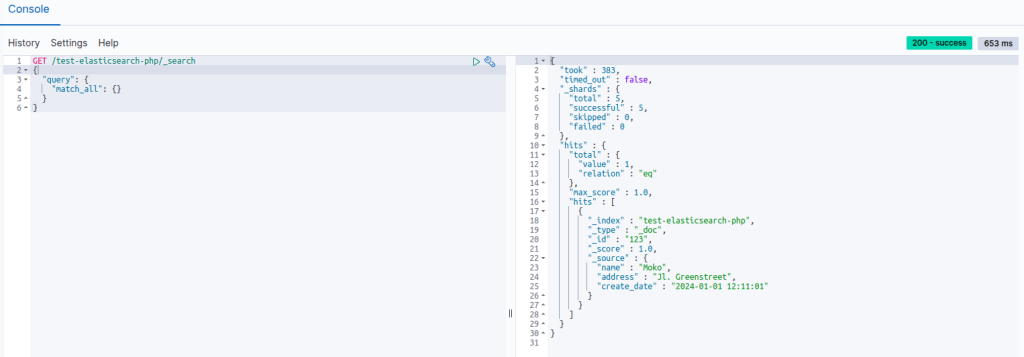
If you see on kibana dashboard, it’s stored in index: test-elasticsearch-php
